Showing posts with label observing. Show all posts

Tuesday, November 12, 2013

My New Stellarvue SV110ED Telescope

I bought myself a new Stellarvue telescope for my birthday this year, an SV110ED, which is currently on sale and a tremendous value.

Stellarvue's telescopes are my favorite commercially manufactured telescopes, bar none. And my new scope makes me feel that even more so.

It's a replacement for my 8" Newtonian for personal use. My 8" Dobsonian will still be my scope for public star parties.

The performance of this telescope easily meets the theoretical maximum for a scope of this size in terms of resolution in its images. Double stars at 1.05 arcseconds resolve cleanly as two distinct points. When the sky clears up, I'm planning to see how well it does beyond theoretical limits. (It's worth mentioning that theoretical limits are not hard physical limits on performance. The Dawes Limit assumes a number of things about the optics and the light. This is why it's possible to have a telescope exceed theoretical limits in its actual performance.)

Not only is resolution excellent, but the contrast is fantastic as well, making this scope create amazing images of deep sky objects for a telescope of its aperture.

I'm very happy with this telescope.

The Mount
The mount for this scope was a bit of a compromise for me. I don't like computerized mounts. However, I want a clock drive so that the telescope will track the object I'm looking at when I use high powers (and if any scope is suited for high power observation relative to its aperture, it's this one.) These days, that pretty well means you get a computer. Stand-alone clock drives are available, but they're not the norm.

I decided to go ahead and take the plunge. I got a Celestron AVX mount from Stellarvue with my new telescope. It's got a computer.

Fortunately, the computer is easy to start up. If you aren't particularly concerned about alignment, or are willing to do a coarse alignment mechanically, you can just start it up with your last settings and skip any calibration procedure. Calibration procedures are the Great Wall that computer driven mounts erect between the observer and the sky.

If you do decide to calibrate, however, the AVX computer's calibration is not too onerous, and is fairly flexible in terms of selecting visible stars. These computers have come a long way.

So I think I can live with the computer.

The mount itself is a German Equitorial Mount. That means heavy. The tripod itself is quite heavy, as is the counterweight and the mount head itself. That means that moving this scope out under the stars is more of a chore than a simple alt-az mount would be. That's the cost of sky tracking, I guess. However, this mount will also support my desired future upgrade to my SV110ED, the SV115 Apo Triplet. So again, I can live with it.

I made one little addition to the telescope's mounting rail, barely visible under the scope tube in the image above. I added a bumper to keep the telescope from sliding through the dovetail. It sits on the sky end of the dovetail mounting rail. So if I have the mount dovetail pointing skyward when I put the scope into it, I don't have to worry about the scope sliding through and onto the ground if I fumble a bit in the dark. Here's a closer image, with an arrow pointing at the bumper:

Now I want more two inch eyepieces...
StumbleUpon

Monday, August 12, 2013

My New Telescope: Ordered and Coming Soon

I presently own several telescopes. The one that sees the most use is my 8" homemade Dobson. It's built pretty close to John Dobson's plans, including a cedar spider for the secondary mirror.


I built that telescope about 11 years ago alongside my oldest daughter building her first telescope. It gets used the most for two reasons: It's the telescope I use for public star parties, and it's just plain easy to haul out, set up, and start looking at stars.

For star parties, it's the perfect scope. It's rugged, so it hauls well. It's easy to set up. It's stable. It stays on target and is easy to put back on target. There are no tripod legs for inexperienced observers to trip over. People like seeing home made telescopes. It works well at low powers, and delivers acceptably good images.

Once, it delivered excellent images. But that day is gone. The mirror has had secondaries dropped on it twice in recent years (no cracks, fortunately) and the coating is showing its age. It's still good enough for star parties, but for my personal use, it's not doing everything I'd like.

I also have a sub-8" Meade Newtonian on a German Equatorial Mount. The optics started out less good than my home made scope. When I made my own telescope mirror for the Dobsonian, I tested the mirror on this one. The outer 1/4" or so of the mirror was seriously out of whack. It caused a lot of reduction in image quality. The rest of the mirror was fine, so I put a flat black cardstock ring over the bad part of that mirror. It sharpened up the image a lot.

The mount, however, is large and difficult to move. It's a project. Just the mount on this scope is heavier and more complex to travel with than the entire Dobson. So falling back on this scope as my primary personal scope wasn't really an option. Too much of my observing happens away from home, at present.

A New StellarVue

I've been lusting after the Stellarvue SV115 telescope for about three years now. I still want one. But, it's just a bit out of reach for me financially. It's worth every dime, but if I don't have it, I don't have it (yet).

However, the SV110ED is also an excellent scope, and at an amazing price. I've also been familiar with it for several years now. Every one I've looked through produces an excellent image for a two-element refractor. Most of the StellarVue scopes are triplets. That is, they have three elements in their objective lens (that is, the "field lens", the bigger one at the end of the telescope that faces the sky.) Coupled with the great design that Vic Maris, owner of StellarVue, gives each of his telescopes, those three element designs produce an image that's as close to optically perfect as it's possible to get. Far better, in my opinion, than designs from his competition (who may turn out occasional scopes that are especially good by chance, but none, to my knowledge, have scopes like StellarVue's where every scope comes out at the apex of optical quality.)

And if my word's not good enough for you, check out what Dennis DiCicco has to say about StellarVue's SV102 telescope in the September, 2013 issue of Sky and Telescope Magazine.

The 110ED is only a "two element" design (two parts to the field lens), but the design is such that it still produces amazing images (like all of the StellarVue scopes.) It is certainly better than my degraded Dobsonian's 8" (202mm) mirror in its current condition, and in the Dobsonian telescope as it is currently constructed.

Better at Half the Size?

There are many reasons a 110mm telescope can outperform a 202mm telescope, even aside from the degraded optics in my Dobson. One is that the Dobson, like all Newtonians, has a secondary mirror in the middle of the light path in the center of the scope. Newtonians have a "spider", which is mechanical elements to hold the secondary mirror in place, which cause diffraction in the image (at least.) The spider legs in my Dobson are relatively thick, being made from cedar shims, in line with John Dobson's original design for this type of scope, which used sections of cedar shingles. I did it not because of optical performance, but to see how they work in a practical sense (which is well--repairs are easy, but optical performance suffers.) I always intended to replace the secondary support with something that caused less effect on the optical image, but time got away from me while I was concentrating on raising my kids, and here we are.

The tube is also quite simple. An optically optimized Newtonian has light baffles inside. Basically these are partitions in the telescope tube that cast shadows everywhere that incoming light is not supposed to be. They are precisely sized to the "cone" of light that the telescope is designed to view, according to the size and placement of optics inside the tube. Instead, I roughed up the the inside surface of my telescope tube, painted it flat black, and called it a day. The tube itself should also be a bit longer to do a better job of keeping stray light from coming in from the side of the front to the eyepiece and focuser.

You get the idea. This is not in any way an optically optimized telescope. It was built to be "good enough". Originally, its performance was excellent when I was at a nice, dark location where the lack of extra tube and baffles wasn't a significant problem. But I did have some nights of viewing ruined by ambient light when I took the telescope into the city for "Sidewalk Astronomy" star parties. Only the brightest objects were visible, and sometimes only when I shaded one side of the end of the telescope from stray light nearby. While I always intended to improve the optical design of my scope, I never actually got around to it.

StellarVue, Right from the Start

The StellarVue won't have that problem. I can count on it being optically optimized right from the get-go. I also know that Vic stands behind his products. If something does come out wrong, or go wrong, he will fix it (needless to say, if it's a result of me doing something terribly wrong, I expect to pay him to fix it. No cleaning optics with steel wool, for example!)

StellarVue has brought more and more of its production of parts in-house over the past several years, too, allowing them greater control over the consistency of the parts they get for producing their products. They can do all the things I never found time to do (baffling, tuning the design), and I get the advantage of it as soon as I put the scope on a mount out under the sky.

Holding and Pointing the SV110ED

As I have said in practically every article on this blog, the best telescope in the world won't do you any good without a mount that's at least equal in quality to the optics of the scope. In fact, I've even advised worrying more about the mount than the optics of your scope. A so-so telescope on a good mounts is far better than an excellent scope on a so-so mount, especially when you're new to astronomy.

I considered getting one of StellarVue's alt-az mounts. These are completely manual mounts that move two directions--up and down (alt, or altitude) and side to side (az, or azimuth movement.) They sell one that would work perfectly, and it's inexpensive for the level of quality. A Dobson mount is a type of alt-az mount.

However, this type of mount has a disadvantage for an observer like myself. I'm going to want to use my 110ED at high levels of magnification. The excellent design of the scope allows it to be used at levels of magnification as high or better than the "rule of thumb" of 100 powers per inch of aperture (depending on observing conditions and the object you're looking at, but I don't want to get into all that now.) Unless you're an experienced observer, this shouldn't be a significant factor for you. The field of view of the 110ED is wide enough that it can be used without any sort of tracking of the sky by your telescope mount up to about 150 powers of magnification. Tracking by hand, with a good eyepiece, will work well.

I'm planning to go higher than that. This is the stuff that my other telescope, the Newtonian on the German Equatorial Mount, would get hauled out for. It has a clock drive, and its movement is oriented to follow the movement of the stars in the sky (really, it's moving opposite the rotation of the Earth.) I decided to get an equatorial mount for my 110ED, too. (I thought about repurposing the mount for my Newtonian, but I actually already have plans for it for a Gregorian telescope I'm building.)

The mount I've bought is the Celestron AVX mount. Stellarvue sells the Celestron line in addition to their own, and they've got many customers before me who've married this mount to this scope, and other comparable StellarVue scopes. It's a German Equatorial, with a clock drive and a guiding computer (normally not an advantage in my book, but I'm willing to tolerate a computer on my telescope if it doesn't get in the way too much. I guess I'm mellowing with age.) Plus...

Plus this mount will be big enough to handle that SV115T once I scrape together the money for it.

Until then, I'm going to have a blast with my new SV110ED. StellarVue says that it will be ready for delivery soon. I can hardly wait. My own StellarVue! Finally!

Expect to see another set of "What Can I See..." articles for telescopes in this size range to complement my series of articles for 60mm telescopes. I will be doing a side-by-side shootout between my StellarVue 110mm scope, a 90mm Meade ETX Maksutov-Cassegrain, and occasionally a 114mm Department Store Newtonian. I may even slip in comparisons to six inch and eight inch telescopes in there.
StumbleUpon

Saturday, April 14, 2012

The Telescope in the Store: Is It Good Enough?

Before you buy, can you:

A. Get a specific visible object in view? (Bright star, planet...anything harder to find than the Moon.)

B. Keep it in view for fifteen minutes or more without heroic efforts?

c. View it for that long or longer without an aching back, neck, or other physical discomfort?

D. View comfortably both standing and sitting?

What's needed:

A. Good low power or Telrad or red dot/ring finder, stable mount, working mount movement locks.

B. Good drive or slow motion controls.

C. Eyepiece at a good height and angle, good eye relief. May require an eyepiece diagonal, tube rotator rings, or other ways of bringing the view to where your body puts your eyes.

D. Suitably adjustable tripod, stand, and other accommodations as for C.

Note: Don't go by what store clerks or product literature tell you should work or should be possible. I have had many scopes with locking screws that don't lock, slow motion controls that are too coarse or sticky or difficult to adjust to be useful. Finders that don't let you see enough of the sky to find anything, wobbly mounts, diagonals that you can't use because the focuser won't adjust enough to focus with them in--all delivered with the telescope!

Don't blame yourself! If it's not working, it's not your fault!

Any properly designed product should do what it claims with the ability of an ordinary person of average ability. Contact the manufacturer or seller to make sure you're not just misunderstanding something, but if you're using the product as intended and not getting results--it's not a good product. Don't fall into the trap of thinking it's you.
StumbleUpon

Monday, March 12, 2012

Mars and Magnification

Normally I tell people not to worry much about high magnification. Most observing, especially for beginners, is done best at low levels of magnification--below 200x, and more commonly at something like 50-100x (power of magnification).

Mars, however, needs a bit more magnification if you're going to see it at its best. Even when it is at its brightest and closest, as it is right now (March 2012) and will be every 26 months.

Mars
Mars, with a range of small, delicate details that require magnification to see.

The largest details on Mars--the polar caps and Syrtis Major--can be seen at magnifications as low as 35-50x depending on your viewing conditions. But Mars will show far more if you can get to 300x or something close to it.

But doing this takes more than a high power eyepiece.

First, we have to have a sturdy mount, which I talk about in many posts, including the linked post. Next, we need to have some way of tracking the sky. To work at high powers, your scope needs to have some sort of automatic drive mechanism, whether it's a computerized clock drive or a kitchen timer with a friction wheel pushing your telescope along. It should work smoothly, and for periods of time at least 15-20 minutes long without needing manual interference.

Then you're ready for a higher power eyepiece or a Barlow (which multiplies the magnification of your current eyepieces.)

But what if you have a Dobsonian or some other manually moved telescope?

In that case, you'll be limited to medium level magnifications, and you won't be able to pick out as much detail. That's because you won't be able to just sit and relax at the eyepiece for as long. I regularly observe through my all-manual Dobsonian at magnifications up to about 250x. It's not as pleasant as deep-sky views at 56x, but it can be done.

You could modify your scope, but to be honest observing detail on Mars is a pretty specialized pursuit compared to working your way through a variety of deep sky objects at low to medium powers. It's not worth taking away from a scope that does that well just to look at Mars.

Instead, consider getting another scope. A smaller one will do, Mars is plenty bright. That keeps telescopes from taking over the household with their size. Plus, a smaller scope can be driven by a smaller drive mechanism. Just make sure it's got a high quality mount that keeps it steady.

Also, the sort of scopes that have good optical qualities for looking at the deep sky are not as good for objects like Mars. They usually have "fast" focal ratios. That is, their f/-number is a small number--six or lower. Scopes with higher f/-numbers, f/7 or higher, will generally give better contrast and detail in views at high powers than a light bucket with an f/4.5 focal ratio.

On top of that, an unobstructed optical train, that is, one without a secondary mirror in the light path, gives the instrument an advantage. An unobstructed 3" to 4" scope, on something like Mars at high power, will perform as well as a 6" or larger telescope with a secondary mirror in the way. Like a Newtonian or Schmidt-Cassegrain.

This is why we can't expect to buy one telescope to do everything. Different scopes do different things well. If we try to make a scope do everything, it becomes compromised for everything. It's better to have a scope that does a lot of things very well, though it's not optimal in other areas. It's best to accept that, enjoying what it does well.

In fact, the best scope isn't necessarily the one that gives the best views. The best scope is one that fits your lifestyle and needs well enough that you take it out and use it a lot.
StumbleUpon

Tuesday, March 6, 2012

Seeing Mars with Color

An inexpensive addition to a new scope is color filters. They're usually sold in packs of three or four at an affordable price. They're threaded to screw into the end of your eyepiece barrel.

Normally it would seem silly to cut off some of the light that comes through your telescope. For many objects, we want as much light as possible to see faint detail. But for some things, like the Moon and planets we often have plenty of light. What we want to see is details that can be washed out by that light, or that are hard to see without some sort of enhancement.

Mars is near its opposition right now. That means its the biggest and brightest it will be for the next two years or so. Right now (March 2012) it's 14 arc seconds in diameter. By June it will have receded enough from us to only appear half that size.

Planet Mars
The planet Mars has lots of fine detail that's hard to see in a telescope. This image shows haze near the polar caps and clouds. Also, there is a lot of fine detail in the reddish/yellowish face of the planet.

Mars has very faint and difficult to see detail. A lot of that detail is lost in ranges of color that our eyes aren't very good at seeing detail in--the orange-red end of the color spectrum. Fortunately there's an easy way of dealing with that--color filters.

I usually like to have four color filters, thought more are possible. Six is as many as I could see being useful. My most-used filters are red, yellow, green, and blue. For Mars specifically, I use the red, yellow, and blue filters. I don't find green all that useful on Mars, though it's very useful on Saturn and the Moon.

Here's what I use red, yellow, and blue filters for on Mars:
  • Red--Best subtle detail in the plains of Mars, or for distinguishing the edges of the "seas" from the plains.

  • Yellow--Best for picking out sharp small details, such as the area around Valles Marinaris, the smaller plains areas around Cimmeria, faint changes in color such as between Utopia and Elysium.

  • Blue--Picks out the polar caps, sharply defining their edges. It also makes the hazes and clouds stand out, such as the polar hazes around the polar caps and the clouds in the equatorial areas, especially near the limb (edge) of the planet's disk.


Green has some minimal value at bringing out the seas and some of the detail in them. A light green filter works better here than a dark green. The dark green reduces contrast too much.

As to the other filters I could see putting in my accessory box, there's orange and violet. For Mars, orange can be very useful. It does some of the pulling out of detail that yellow does, though not as well, but it also brings out some of the subtle shadings that a red filter brings out along with sharpening the detail a bit.

Violet works well on the same things that blue does (polar caps, atmospheric haze and clouds), but it can sometimes pick out equatorial clouds near the center of Mars' disk that a blue filter won't quite show.

Check out filters for your telescope. They come in different sizes depending on whether you have 2" diameter eyepieces or 1.25" eyepieces. The larger ones are more expensive.

You don't need a full set to start with, either. Starting from scratch, I'd say the most generally useful filters are a yellow filter and a light green filter. The next most useful are the red and blue filters. Orange would be next on my list, and the violet is a specialty filter that I wouldn't rush to buy unless I already had everything else I wanted. A dark green filter is good for the Moon, but not much else, and a neutral density filter, especially a variable one, works just as well on the Moon and has other uses as well.
StumbleUpon

Saturday, January 7, 2012

Learn to Use Your New Telescope!

Did you get a new telescope recently? This is the time when the most new telescope owners are made!

Using a telescope isn't entirely natural and easy, no matter what scope you have. In fact, the scopes with the most "ease of use" features are often the hardest to get started with.

A local astronomy club is a good way to find others who can help you learn more about how the get the most out of your telescope. They're using their own telescopes, they will know some good places to use them, vital accessories for them (very few telescopes are sold with everything they really need to be useful), and have tips. The club may have formal classes, or just give you the chance to meet up with others with like interests to yours, and more experience.

There's information available online, but having someone who can actually be there with you and your scope, even if just for a short observing session or daytime practice session, can be invaluable. They can see things in a moment that you won't know to mention online. They can tell you things just as quickly that would make for long murky postings online. The "personal touch" makes all the difference.

Also, don't beat yourself up while you're learning. Learning to see things through a telescope is something you have to do. It's not natural like looking with your eyes without an instrument. If you're experienced with using other optical instruments like binoculars or microscopes it'll help, but a telescope is still a different animal that takes getting used to.

Don't set yourself up for failure by expecting to see observatory photograph views of difficult objects. The Horsehead Nebula doesn't look like the pictures to eye, and it's very, very hard to see even with the correct telescope and accessories. Start by looking at things chosen from a naked-eye astronomy book or binocular astronomy book. Train yourself to find the objects, keep your scope on them, and see the detail in them.

Each scope behaves differently, and you will want to get experience seeing what your scope shows. It's a matter of experience, and you'll find there are several different levels you can achieve as your skills develop. Regular repetition with the right equipment is the key to developing. Each new level brings a new level of enjoyment. Things that didn't look like much before suddenly become far more interesting, even if the equipment hasn't changed at all. You learn to see an notice things that weren't apparent before.

Plus you'll need to learn to be patient and give your eye the time to see what you're looking at. Most beginners spend far too little time actually looking through the eyepiece and relaxing once they've got something to see in it. Your relaxed eye will see far more than an eye that is rushed through a quick "there it is!" look.

Keep your scope stored in a state and location where you can easily use it. Its size and type matter far less in its performance than whether it is simply taken out an used regularly.

If you seem to be hitting a wall, there may be something that needs to change with the equipment, or that you need to know about how to use it. Don't be discouraged, find an answer. Astronomy is not supposed to be difficult. If you find that it is, suspect that there's something else you could be doing other than what you are doing.

Don't be daunted by the fact that there are things to learn. The process of learning them is (or should be) a pleasure in itself. There are many ways to approach doing astronomy, none of the good ways require an overabundance of patience or muleheadedness or a giant egg-shaped head. All they take is normality, an interest, and the ability to ask questions and occasionally follow directions.
StumbleUpon

Saturday, November 19, 2011

Observing with a 60mm Telescope: Technical Details

When determining what you can do with any telescope, there are some equations which give you an idea of what you can expect from your telescope. These equations are estimates, as they don't take into account the construction details of your particular scope. The better your scope is optically, the closer it will come to these estimates.

But in any case, real, practical observing and the skill of the observer will be more important than numbers turned out of an equation. So all these numbers should be taken with a shaker-full of salt. Like the gas efficiency numbers for a car, they're a basis for comparison but not reality.


Lowest Useful Magnification

The equation for this is the diameter of the telescope divided by the observer's pupil size when open to its widest. Basically it measures how large the image can get before light is lost outside the observer's pupil:

Lowest Useful Magnification = D / p

Where D is the telescope's objective diameter, and p is the pupil diameter. The rule of thumb version is:

D(in inches) x 4 for a 6mm pupil (older adult average pupil)
D(in inches) x 3.6 for a 7mm pupil (younger adult average pupil)
or
D(in mm) / 6 for a 6mm pupil,
D(in mm) / 7 for a 7mm pupil.

With a 60mm telescope, that gives us a minimum useful magnification figure of 9 or 10 powers.

This is tempered by the practicality of getting an eyepiece that's one ninth or one tenth of the focal length of your telescope's objective. If you have a 60mm f/10 telescope that would be about a 60mm focal length eyepiece! Typically the longest eyepiece focal lengths you'll find in a size for your 60mm telescope are about 45mm. This would give the 60mm f/10 a magnification of 13.

A 60mm f/6 telescope has a focal length six times 60mm, or 360mm. A 36mm eyepiece would give 10 power in this telescope. A 42mm eyepiece would give a magnification just under 9 powers.

What does this mean?
What this means is that it's just about impossible to go to powers that are too low for your 60mm telescope to be useful. As a matter of practice, it's not really a problem to go below the "lowest useful magnification" by a bit, as in the example of the 60mm f/6 with a 42mm eyepiece. You'll lose a little light outside the area of your pupil, but the eyepiece will also be a bit more forgiving about how you position your eye next to it. It also adds to the "spacewalk" experience when your eye can get image even when you move around a bit at the telescope.

Low powers are also where you'll typically get the widest field of view from your telescope. They are well suited for looking at dim deep sky objects, concentrating their light into a smaller area in your field of view, making them easier to see in spite of your limited light gathering power.


Minimum Magnification to See Finest Detail
This is a calculation to estimate what magnification you should use to make out the finest detail in well-illuminated objects like planets and the Moon. If you are below this magnification, you're missing some detail, theoretically. If you're above this, the light on dim, marginal objects will be spread out, possibly causing some detail to be lost.

In practice, this is a decent estimate of the highest magnification for the scope for general use, and the highest usable magnification for the scope will be about twice as high with brighter objects.

The calculations assume that the observer can see detail down to about 100 arcseconds without a telescope.

A simple way to calculate it is 100/R, where R is the resolving power of the telescope in arcseconds. For a 60mm scope, R is about 3.0 in practice, as low as about 1.9 in theory. This gives us values from 33 powers to 52 powers.

This result again emphasizes that the 60mm scope is at its best at low powers of magnification. It gives us a practical top magnification for image details at around 70 to 100 powers depending on how good conditions are. Better conditions allow higher powers. The lower powers are the magnification that will give the finest detail on planets, the Moon, in nebulas, and so on. The higher powers are how high you can normally expect to go without losing lots of internal detail. In objects where internal detail is not as important, such as a galaxy where you're trying to find the outer extremities, you can go to lower power to raise surface brightness. Along the Moon's terminator, where contrast is very strong, you can probably still see plenty of detail at higher powers.

Maximum Useful Magnification
This is another useful rule of thumb. It's also based on the aperture of the scope. This is one of the things that causes "aperture fever", where amateur astronomers keep going for larger and larger telescopes. In fact, the contrast of the image will determine what can be seen with the scope and how well it will work with higher levels of magnification as much or more than the aperture. But contrast is tricky to measure, while all it takes to measure aperture is a ruler and the open end of a telescope.

Standard rules of thumb for this figure are as follows:
M = 20 x D(inches) or
M = 0.8 x D (mm)

For a 60mm telescope, this gives us a maximum magnification of about 48 powers. The rule of thumb also states that typical magnification should be about half this value to get maximum brightness and contrast.

Does that mean your scope is useless at powers higher than about 50? No way! This is a rule of thumb more applicable to larger scopes (6 to 30 inches) than it is to smaller scopes. Also, this number will vary dramatically depending on the optical quality of your scope. The highest quality refractors in 60mm aperture can give great detail at over 300 powers under the best conditions. But this isn't too bad a measure for a scope of moderate performance. Basically, while the number it produces is low, it again emphasizes that the best performance for a small scope is at relatively low powers. You'll see more if you use your scope in the way that it works the best.

Theoretical Limiting Magnitude
This is the theoretical dimmest star you can see with your telescope. For your 60mm this is a magnitude of 10.6. The highest quality scopes will outperform this, and poorer scopes won't do this well. My experience is that the contrast of the image the scope gives, and the quality of the sky--how dark the background of the sky is--have the strongest effect on this.

For "extended objects", that is, anything that doesn't have all its light in a single point like a star, the apparent magnitude is a measure of all its light put together. So if you find a galaxy in a catalog that has a magnitude of 10.4, it may well not be visible in your 60mm telescope, even though your scope can theoretically see even dimmer objects. The problem is that the light is spread out over a larger area, so that the light at any point is too dim for the telescope to show it.

Putting It All Together
Upshot for a 60mm telescope, keep your powers low to see the most. Pick bright objects to observe. Get to dark skies if you can. Get the best optics possible, and remember that optical quality doesn't matter at all if you're not working on a good, solid mount that holds the scope on target.
StumbleUpon

Saturday, November 12, 2011

Observing Galaxies with a 60mm Telescope

This article is part of a series I'm doing on observing with 60mm telescopes. 60mm telescopes are among the most common of first telescopes. My own first telescope was a 60mm which I used for over 10 years, before "moving up" to a 75mm, then over 20 years later to a 200mm telescope. The points in this article are applicable to larger scopes than 60mm, though it is written about 60mm scopes.

In the first article in this series I listed a number of galaxies that can be seen with a 60mm scope. Here I'll cover some of the best, along with tips on how best to observe them with a small telescope.

Conditions for Observing
With a small scope, small things can make a difference between success and failure when observing faint objects. The sky must be right. Low atmospheric moisture levels mean better contrast and more light from the galaxies you want to view. The telescope must be right. It should be in good condition, with clean optics, and most importantly of all, a stable mount that holds the telescope securely on its target, and allows the scope to be moved and pointed easily. The observer should be in a relaxed, unhurried mood.


Bright Galaxies
There are a few galaxies that are bright enough to be seen easily, even with a 60mm telescope. The Andromeda Galaxy, M31, is one of these. In the southern hemisphere the Large and Small Magellanic Clouds are visible to the eye, so they're easy to find and point the scope at. They're also bright enough to show a lot of detail. M31 is too large to fit into the field of view of a normal telescope, but the brightest parts of the halo, the disk part of a spiral galaxy, and the nucleus, the ball of stars at the center of a spiral galaxy, are visible. It is a good observing exercise to see how far from the nucleus of M31 you can go while still being able to tell the halo of M31 from the background sky.

Low powers will give the best contrast in a small telescope like a 60mm. It is more important to be able to make out the galaxy against the background to see it than it is to magnify the detail in them. The higher the level of magnification, the more the light from the galaxy gets spread out, lowering the contrast. The brightest galaxies, like M31, LMC and SMC, M65 and M66 will allow some moderate magnification. Still, they are best viewed at the lowest power possible with the telescope.

If you don't have an eyepiece with a longer focal length than 25mm, you may consider getting one just for observing deep sky objects at low powers with your telescope. either 32mm or 40mm are fairly common. My 40mm eyepiece is my favorite for viewing galaxies, and once it goes into the focuser for the evening, it almost never comes back out.

Dimmer Galaxies
There are many dimmer galaxies visible with a 60mm telescope. Don't expect them to look like the photographs. They'll look like fuzzy gray spots. But they'll have different shapes, brightnesses, and distributions of light across their visible form. Some will have bright centers and dimmer areas around, others will be equally bright all across, others yet will be splotchy or broken into multiple sections.

Near M31 there are two other galaxies, M32 and M110. They are much, much smaller companions of M31, like the LMC and SMC are companions of our galaxy. They are easy to see because they have a high surface brightness. This is the most important determinant for whether a galaxy will be visible in a small scope.

The apparent magnitude is the brightness listed in sky catalogs for galaxies. It's a misleading number, because it is the measure of how much light it would put out if all its light were gathered into one point of light, like a star. But the light is spread out over the whole face of the galaxy.

How much light is put out by any specific part of the galaxy you see is the surface brightness. A galaxy may be bright, but have a low surface brightness. The Triangulum Galaxy, M33, is like this. It is visible in a 60mm scope, but only with difficulty, because any part of it is very dim. Its total light is spread out over a large area of sky. M110 is very bright at any point. It is compact and well defined, making it easy to see compared to M33. So when reading descriptions of galaxies, look for those with a high surface brightness to view with the 60mm scope.

M108 and M109 in the Big Bear both have a high surface brightness. They are spiral galaxies that we see edge-on, so they appear as a short line of light or small lens shape near different parts of the Big Dipper.

M65 and M66 are bright galaxies in the leg of Leo, The Lion, that can be seen together in the same low power field of view. So you can see, and show others, two galaxies at once! There is a third galaxy nearby that's a bit dimmer, but if you can see it, you'll have three galaxies at once.
StumbleUpon

Sunday, November 6, 2011

Observing the Deep Sky with a 60mm Telescope

"Deep Sky" observing is not normally associated with a telescope as small as a 60mm (2.4 inch). There are many nice objects that can be viewed well with a small telescope, however. This is part of a series of articles on this blog about observing with the 60mm telescope. The information also applies to larger scopes, which can get even more out of these objects with their greater observing power.

There are a good number of objects that most any 60mm scope can show well, so long as they have a decent mount. The Lagoon and Trifid Nebulas, the Hercules Cluster, the Great Orion Nebula, the Crab Nebula, and many star clusters are all wonderful objects to show off the abilities of your small scope.

60mm scopes with the highest quality optics and very good mounts can show objects that are usually thought of as objects requiring larger telescopes. Better mounts give a steadier view, and allow you to relax more while looking. Better optics improve the contrast of the image, which makes it easier to find and see the object you're looking for, and to see more of the detail in it.

Star Clusters
Star clusters are the deep sky objects your small scope is most suited for. They are relatively bright, and very numerous, meaning there'll almost always be plenty of them in the sky to choose from. There are two basic types of star cluster, the "open" cluster, which is a general group of stars that happen to be near each other, and the "globular" cluster, which is a group of stars whose mutual gravity has pulled them together into a globe shape.

Both types are visible in your 60mm telesccope. In my first article in this series I listed a good selection of star clusters that can be viewed with a 60mm scope. Here's I'll describe some of my favorites, and observation tips that apply to all clusters.

Globular Clusters
M13, the Great Hercules Cluster, is a showpiece object for northern hemisphere astronomers. It's a big glowing ball of stars in the Keystone of Hercules. Different globular clusters look different. Some have a very even brightness across the face of them, others are brighter at the center then the brightness tapers off as you go outward. M13 is one of these, much brighter at the center. Its brightness drops off regularly from center to edge. Individual stars can be picked out at the edges, with tendril-like streams of stars flowing outward around M13s boundaries.

Compare this with M22, near the top of the Teapot in The Archer, visible to observers north and south. It is about the same brightness as M13 overall, but the bright wash of its center extends well across its diameter. Only the outer parts dim. Southern observers can also enjoy the enormous globular Omega Centauri. M13 and M22 are both visible to the naked eye, but not like Omega Centauri! In the telescope, Omega Centauri shows enough detail to spend a lot of time enjoying it.

Open Clusters
Star Clusters with no particular form are also beautiful in a 60mm. A good night with high contrast skies will show these the best, making more stars visible in the cluster as well as making them stand out clearly from the background sky.

The Beehive Cluster and Alpha Persei Moving Group are beautiful groups of bright yellow stars. As is the case for star clusters in general, they should be viewed at the lowest power you've got for your scope. This would be the eyepiece with the longest focal length. This is the number shown on the eyepiece, usually given in millimeters (mm). Sometimes a viewing angle or other number is listed as well, but the focal length is usually listed most prominently in this case. The one with the largest number gives the lowest power views. For example, a 25mm eyepiece will give lower power magnification than a 15mm eyepiece.

The Seven Sister, or Pleiades (M45) are spread out too far to be seen all at once in nearly all telescopes. But the area can be scanned at low power. About 40-some stars are visible in all under the best conditions, and faint nebulosity (cloudiness) is visible in this area as well.

M39 is a nice, tight cluster at the edge of the area of sky that holds The Swan. It is easily contained in the telescope's field of view, and stands out nicely from its background.

Nebulas
Nebulas are clouds of gas and dust. There are several different sorts. Planetary nebulas are ones that tend toward being round, looking a little like "planets", which is why they have that name. They have nothing to do with planets other than looking a little like the disk that a planet shows. Supernova remnants are clouds of material that have been blown into space by an exploding star. Most commonly seen nebulas are general clouds of gas and dust in the spiral arms of our galaxy. Many of these are places where new stars are being formed, so they are often associated with nearby star clusters.

There are a few bright star clusters that look really good in a 60mm telescope. Most, however, are faint, show little detail, and are very hard to see in a small scope. The Great Orion Nebula near the belt of Orion, and the Lagoon and Trifid Nebulas in The Archer are among the best. On a clear night with a dark sky they show up clearly, with traceries of their gas and dust forming streamers and shapes inside and around them. At their best, they can show a faint greenish color, though they'll usually just show shades of gray in a 60mm.

The Crab Nebula, M1, in Taurus, is a fine supernova remnant for small telescopes. It is relatively easy to find, near the tip of one of The Bull's horns.

Fainter nebulas can be seen as small cloudy shapes. They are a good way to develop your skill as an observer, both in finding them and in observing their form. NGC 6334 lies near the star cluster M6, and is a good starting point for seeking more challenging nebulas.

Many planetaries are very nice to observe in a 60mm scope. Their compact form and well defined edges make them easier to see than a lot of the more "gaseous" looking nebulas.

The Saturn Nebula, NGC 7009, in Aquarius the Water Bearer, is very bright and has a nice green color visible even in small scopes when the sky is good. The Eskimo Nebula, NGC 2392, in Gemini the Twins, is fainter, but its form can be made out easily once found. The Ring Nebula, M57, in Lyra is a favorite of small scope owners. It looks like a smoke ring. It is bright enough to take your scope to its highest magnification, as is the Saturn Nebula.

In the next article I'll cover the final sort of deep sky object you can see with a 60mm: galaxies.
StumbleUpon

Sunday, October 30, 2011

Observing the Moon with a 60mm Telescope

This article is part of a series on using and observing with a 60mm telescope, one of the most common of beginner telescopes. The information also applies to larger scopes, which can show more detail and find objects that are difficult with a 60mm scope more easily.

The 60mm scope can be a very rewarding scope to use, however, especially when getting started. They are compact, often inexpensive, even for quality scopes, and easy to use when well designed. They remain useful even when there are better scopes in the house because of their small size, light weight, and general ease of use.

I used a 60mm scope as my primary telescope for over 10 years. My first scope was a 60mm telescope, unfortunately mated to an extremely poor mount. I fought the mount for many years, if I had been less mule-headed I would have probably given up on astronomy. Fortunately, I finally decided to rebuild my mount using wood from my school's wood shop scrap bin. It looked awful, but held the scope on target and steady. The optics were actually pretty good, once they stayed where they were put.

Observing The Moon
A 60mm is enough scope to enjoy practically everything the Moon has to offer. The craters, valleys, walls, ridges and seas of the Moon will all stand out nicely at low to medium powers (25 to 150 powers). If your telescope has a clock or computer drive you will also be able to use higher powers on the Moon (150 to 250 powers). It is one of the few objects that is bright enough for high powers for a small telescope. But it will be a lot harder to get a sharp focus and to stay on your target at higher powers.

The best place to look on the Moon's surface for nice detail is near the dividing line between night and day on the Moon. This is where the contrast is the sharpest. Plus, you can see changes as time passes in these places. One of my favorite things to do is find a crater where the rim is in sun, but the floor is still in darkness. Sometimes, every so often, I can watch the Sun illuminate the central peak of a crater as I watch. It'll go from darkness to a sudden spot of light in the middle of the crater. Other times I'll look at an area, go look at other things elsewhere, then come back an hour or so to see if anything has changed in areas I've looked at earlier in the night.

Many parts of the Moon will be too bright to show much detail, or will be so bright in the telescope that it'll ruin your night vision. In this case the little Moon filters that come with many telescopes, designed to be fitted to the eyepiece, can be helpful in cutting the light down to a more tolerable level and help bring out some contrast. Unlike the little solar filters, these are safe to use. If a Moon filter didn't come with your telescope, there are many color and "neutral density" filters available that you can get inexpensively.

Neutral density filters are strictly "black and white" filters that cut down brightness without changing the colors of what you're looking at. They are my favorite for using on the Moon, especially when I'm looking for color on the Moon. One sort is a polarizing filter, which can be adjusted to different darkness levels. These are also useful for seeing cloud details on Venus, but they tend to be expensive.

Color filters also work well on the Moon. Darker colors often come in packs of different color filters that are commonly sold. About the only object these darker filters are useful on is the Moon. Dark red, orange, green, and yellow filters will each have a different effect.

Light color filters are nice for bringing out detail in areas of the Moon where there is some color in the soil. These colors are very faint, and the filter will eliminate the ability to see the colors directly, but they will bring out more detail of the surface in these areas.

Be careful of trying to take the magnification too high. It's tempting on the Moon, but more detail will actually be seen at moderate powers by relaxing (a couple of deep breaths are always good) and taking the time to let the subtle details of the image "sink in" as you view.
StumbleUpon

Sunday, October 23, 2011

Observing the Sun and Planets with a 60mm Telescope

In What Can I See With a 60mm Telescope I gave brief lists of some of what you can observe with a 60mm telescope, with just the briefest of notes on hoow to do that observing. Now I'll cover some of the details of how best to observe the objects mentioned in this and subsequent articles.

First, the Sun and the planets. The Moon and the various deep sky objects are large enough subjects that I'll cover them by themselves elsewhere.

Magnification

You can use both medium and low magnification on the planets when observing them. They are bright enough that even with a 60mm telescope you can enlarge the image with magnification and still see some detail where there's detail to be seen. Each planet observable with a 60mm scope is detailed below.

For a 60mm scope, low magnifications range from about 20 powers (or 20 diameters, if you prefer), to about 100 powers. Medium levels of magnification are the highest practical magnification levels for this size scope. A 60mm will not allow what is typically referred to as "high" power magnification. Medium powers run from about 100 powers to about 200 powers. Anything more in this size scope will result in such a loss of detail and contrast that you'd actually see more at lower powers.

If your scope has eyepieces that claim to give higher levels of magnification, take them out of your usual kit of stuff you take observing with you and set them aside for another telescope. You'll get the best views from your 60mm at magnifications from 40 to 120 powers, the scope is usable up to 150 powers or so, and can be used at up t0 200 powers if everything about the scope and the sky is perfect. Higher levels of magnification are theoretically possible, but are, in practice, show far less than lower powers.

Mount
In this size range of telescope, the mount is actually far more important than the optics of your scope. Most optics in this range are pretty good. The finest optics and best designed 60mm telescope will show far more, of course! But to show anything the mount must be able to hold the scope steady and on the object you've pointed it at.

Plus, to observe using higher powers (over about 120-150x), the mount will have to have either good slow motion controls or a clock or computer drive. Mounts without these will work perfectly well at the lower powers, my mount for my 60mm has no drive or slow motion controls.

First and foremost, though, the mount has to hold the scope still. It shouldn't slide down or up when locked in place. It shouldn't shift halfway across the sky when the position is locked in. It should be possible to thump the scope lightly and not have it move off target.

There are many 60mm telescopes sold with good mounts today. There are also very, very many sold with the awful mounts of yesteryear that frustrated the heck out of me. The best thing I ever did with my 60mm scope was build a new mount that actually held it in place. You can do even better, by getting a good mount that works well right from the start. If you can get one with either a drive mechanism or with slow motion controls, that's nice. If not, don't fret. You can do a lot of observation with even the simplest stable mount.

The Sun
The Sun is only safe to view if you have a solar filter that fits over the front of the telescope. The sort that goes on the eyepiece is not safe to observe with, they will overheat and crack. If somebody's eye is there when that happens, that eye will be blinded forever by the damage from the concentrated sunlight. I have literally had one of these filters crack just as I looked away from the eyepiece. Don't trust the little eyepiece sun filters, not even for a moment. If one came with your scope, throw it away before you are tempted to give it a try.

If you do have a proper filter, your scope will show you the surface of the Sun, including any sunspots visible on it. You can watch the sunspots move as the Sun turns. They are most interesting to watch as they appear and disappear at the edges of the Sun.

Rarely, either Mercury or Venus will pass between the Earth and the Sun. This is called a transit. Usually it can only be seen from a particular part of the Earth that's lined up right. But, if you have a properly outfitted 60mm telescope for solar observation, and you're in the right place at the right time with nothing blocking your view, you can observe a transit with your telescope.

More common is a solar eclipse, where the Moon passes between us and the Sun. A telescope fitted for solar observation can also be used to watch a solar eclipse close-up.

Mercury
Mercury appears as a small orange-red disk in a 60mm telescope. It doesn't show any detail, but its color will change depending on the sky conditions you observe it under. It is always near the Sun, so it can only be observed near sunrise or sunset. Sometimes it can be seen during the daytime, but it is so close to the Sun that it's not really safe to observe without the chance of accidentally moving the telescope onto the Sun.


Venus
Venus appears as a small, bright, Moon-like object. It shows phases, and can be magnified to the limit of your scope's ability. Rarely, cloud detail can be viewed in a 60mm with a variable polarizer filter, though it usually takes a larger telescope to manage this.

The phases of Venus are quite distinct, looking just like phases of the Moon.

Venus can be observed safely in the daytime when it is far away from the Sun, at or near what is called "greatest elongation" which is astronomer-speak for farthest it gets from the Sun. Be very, very careful when locating it, however. Initially align your telescope without your eye at the eyepiece or the finder scope, using the shadows cast by the Sun to make sure that the scope isn't pointing at the Sun. Then, sweep away from the Sun, never toward it. If you need to go back closer to the Sun, take your eye away from the scope or the finder, move the scope while watching the shadows, don't put any body parts in line with the eyepiece (the Sunbeam that comes out of it will burn), better yet, cover the objective of the telescope when going back toward the Sun. Then again sweep away from the Sun.

When seen during the day, Venus looks like a little Moon as seen during the daytime.

Mars
Mars shows some surface detail, unlike Mercury and Venus. It will show light and dark areas at medium power. A polar cap is visible, especially when the position of Mars and its season is right, when the polar cap may cover about 1/4 of the visible planet's disk. Mars has an especially nice display about once every two years, when it is closest to the Earth.

Its two moons are too small to be seen, even in much larger telescopes, so don't expect to find them. If you see something nearby, it's likely a background star, or possibly an asteroid if it appears to move rapidly with respect to Mars (rapidly meaning about as fast as a clock's hand!)

Color filters can bring out subtle detail in Mars' surface when Earth is close enough to make Mars look its largest (it never, never gets as large as the Moon, however! That's just an internet myth.) Light colored filters work the best, I use very light yellow and blue filters, and occasionally a very light orange filter, to bring out details of light and dark areas on the surface of Mars at about 200-250 powers when everything--sky, mount, telescope, my eyes--are at their best.

Ceres and the Bright Asteroids
About a dozen asteroids are visible to a 60mm scope in any given year. Finder charts for them are online and in the major astronomy magazines and their annual supplements. None of them shows the form of a disk, they all appear as stars, at best.

They are most interesting to observe when you can watch them from night to night, seeing the movement of the "star" relative to the other stars near it.

Rarely, there will be an asteroid that is rotating at a rate that makes it brightness change as you watch. These are incredibly interesting to see, as it is so rare, and such a clear sign that that "star" is not like the others.

Jupiter
Jupiter is one of the things that your 60mm scope was built to view. It is a showpiece for your scope. It's what you show visitors so that they can say, "Wow," when they look through your scope.

Jupiter will show bands in its atmosphere, even at low powers. If the Great Red Spot isn't busy blending in with its background, it will be visible at the highest powers your scope can achieve (sometimes it's more visible than others.) It was very obvious back in the 1970s and 1980s, but then it began to dim and fade in with the cloud belt it is in. Now it is becoming somewhat more visible again. Hopefully it will continue to do so. Back in the 1970s it looked like a great big cherry, standing out clearly from its cloud belt even in a 60mm scope.

Larger scopes often have to block off some of the excess light from Jupiter when it is at it brightest. You are unlikely to have that problem with a 60mm. You should be able to see at least two dark bands, one above and one below, as well as the dark areas at each pole easily. That makes seven stripes (four dark, three light) that you should be able to see, even with so-so optics. Fine, high quality optics show far more, including far more detail within each of the bands such as veils, columns, rifts, bays, garlands, tails, festoons, and numerous other features. This is why people pay more for better optics, even in small scopes.


Jupiter's Moons
The four Galilean Moons will be easily visible through the 60mm scope. They will appear as small stars in line with Jupiter's equator. Occasionally, their shadows can be seen on Jupiter's surface, or they can be seen to cross in front of Jupiter if you have good optics. Their movement changes noticeably over the course of an evening, but if you just sit and watch them it's like watching the hour hand move, so memorize where they are, go look at something else, then come back for another look later.

Saturn
Saturn is probably the best object to see in your 60mm telescope. My wife still tells the story of how she "discovered" Saturn in her 60mm telescope when she was young.

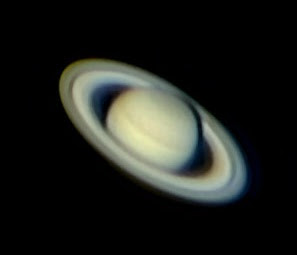
The planet is bright, the rings are easy to see at 40x and higher. Careful observation with a relaxed eye will show bands in the atmosphere of the Saturn. The angle of the rings varies over time. When the rings are "open", that is, tilted at a higher angle and not edge-on, the Cassini division is visible in the rings. Better optics will show other divisions and more detail in the rings.

The moon Titan shows easily in all 60mm scopes. It appears as a bright star near Saturn. Four, and possibly as many as six, other moons will be visible. Seeing all seven moons that are possible with the 60mm requires absolutely perfect conditions and the highest quality optics. Normally, Titan will be easy, and two to four other moons will be visible with varying levels of difficulty.

Uranus
Uranus appears as a small disk, often with a faint greenish color to it when it is at its brightest. None of its moons are visible, nor are any details of its surface. Low powers show it the best, and throwing the image slightly out of focus may reveal color when none is visible otherwise.

Neptune
Neptune appears as a very small disk at the higher powers for your scope. When at its brightest, it may show a slight blue color. No detail is visible on the disk. This is a challenging object to observe with a 60mm scope, it is often very hard to tell Neptune from nearby stars. No moons are visible.
StumbleUpon

Saturday, October 15, 2011

What Can I See With a 60mm Telescope?

60mm telescopes are among the most common and most popular. They are inexpensive, generally, don't take up too much space, and easy to come by. Most of them have optics that range from decent to good, with a few very good models out there. 60mm is enough light gathering power to enjoy a lot of different objects in the sky.

I used a 60mm scope as my main telescope for over 10 years before "moving up" to a 75mm reflector. During that time I learned how to get the most out of my telescope as my abilities advanced and I learned both more about the sky and more about using a telescope. My wife still owns a 60mm telescope, and though our household has many larger scopes, it still comes out to the front yard or back porch on occasion for casual observing sessions. It's light, easy to use, and enough telescope for many objects in the sky.

The thing that holds a lot of these smaller scopes back, especially at the low end of the price range, are poor mounts. But, if you can put your scope on target and get it to stay there, here are some of the sights you can expect to enjoy with your 60mm (2.4 inch) telescope.

In this article I'll be covering a brief list of what you can see with a 60mm telescope, which may be far more than you'd expect for such a modest aperture. There are a few objects that are downright magnificent, even with such a small scope. These are the brighter objects, where the mere 60mm of light collecting power is not a disadvantage. Most objects will have much more subtle detail, however, and will require more patience at the eyepiece to appreciate fully.

There are also objects that the challenge of observing them at all in such a small instrument is part of the fun. Collecting star clusters, globular clusters, or galaxies observed in a 60mm telescope can be a rewarding occupation all on its own. Plus, if you have the opportunity to use a larger telescope, you are already skilled at finding challenging objects, and can see your old friends with far greater detail.

Here are some of the things you can see with a 60mm telescope. Subsequent articles go into more detail about observing each of the different types of objects with your small scope. These objects are also good in larger telescopes that gather more light. They'll usually be easier to locate and will show more detail in larger scopes.

The Moon
Craters, mountains, seas, rifts, valleys, searching for colored areas on the Moon. The 60mm scope turns the Moon from a bright object in the sky into a world whose terrain you can explore.

The Sun
Use only a full-aperture filter over the front of the telescope. Never use one of the little eyepiece solar filters! You can observe sunspots, transits when they occur, and eclipses.

The Planets
Mercury, Venus, Mars, Ceres, Jupiter, the Galilean Moons of Jupiter, Saturn and its rings, Titan and four other moons of Saturn (possibly as many as seven moons total under perfect conditions!), Uranus, Neptune. Jupiter and Saturn are two of the finest showpieces in the sky for the 60mm scope.

Saturn and its rings

Other Solar System Objects
Typically about a dozen asteroids will be bright enough on any given year to be seen with a 60mm telescope. Also, usually two or three comets appear that can be seen, sometimes more.

The Stars
Stars are the forte of the 60mm telescope aside from the Moon, Jupiter, and Saturn. In particular, double and triple stars and the brighter, tighter star clusters. Mizar and Alcor in the Big Dipper make a good start for northern hemisphere observers, then zooming in on Mizar to see both Mizar and its companion, Mizar B. Just to the south of Alcor and Mizar lays double star Cor Caroli in the Hunting Dogs. Leo contains several nice double stars for observers in both hemispheres, and there are many, many more spread throughout the sky.

When observing individual stars and double stars you will be able to take your telescope to its highest practical magnification levels, about 150 to 200 powers if you have a good mount and either a clock drive or good slow motion controls on an equatorial mount. Otherwise, you will still get plenty of good observing at magnifications of about 50-100 powers. More on this is later articles.

Colored Stars
Most stars appear pretty well white. But some have a distinctive color. Herschel's Garnet Star in The Charioteer is a star that shows its color most strongly in small telescopes. In larger scopes the color begins to "wash out". It is a bright red in a small scope, becomes amber in a larger scope, and finally a watery yellow in the largest amateur telescopes. The double star Albireo in The Swan is a pair of stars of differing colors, each one setting off the color of the other, one yellow, one blue. The Red White and Blue triplet in The Swan is another close group where the color of each sets off the colors of the others. There are many nice colored stars in many constellations.

Star Clusters
When observing star clusters you will usually want to view with the lowest possible magnifications for your telescope to see as much of the sky at once as you possibly can. Many 60mm telescopes come with eyepieces that give far too much magnification for the aperture of the scope, but they don't come with eyepieces that allow the scope to work at the incredibly useful low levels of magnification they are capable of. Eyepieces of 35mm and 42mm and thereabouts make great "sky sweeping" eyepieces, and are the sort of thing you want for most "deep sky" objects.

There are many star clusters you can enjoy with the 60mm telescope. Some are too large to see all at once but can be "swept" to be enjoyed. There are two basic types of star cluster. The "open" cluster and the "globular" cluster. The globular cluster looks like a globe of stars. Open clusters vary from ones that look almost exactly like globulars to loose groups of stars that are near each other.

Here are some you can see in your 60mm:
Double Cluster in Perseus, M13 the Great Hercules Cluster, M103, M7, M6, M39, M22 the Arkenstone, M70, M54, NGC 6242, NGC 6281, M80, M4, M2, M5, NGC 6231, M45 The Seven Sisters, M11, M17, M62, M55, M28, M54, M69, M75, M26, NGC 6664, NGC 6712, NGC 6649, and many more. If that sounds like a lot of gobblety-gook, it's because I've mostly just given the "short" name of the cluster, which is a catalog number. Most of these are from the Messier catalog (the M numbers), a great list of objects to observe with a small telescope.

Deep Sky Objects
Star clusters are one type of "deep sky object", which is basically anything that isn't a solar system object or an individual star or star system (in the case of double, triple, and other multiple star systems.) You can see galaxies, nebulas (space clouds) and other things with your 60mm as well.

Galaxies:
M31, M110, M32, M33, M65, M66, M51, M101, M108, M109.

Planetary nebulas are roundish clouds of dust and gas thrown off by some stars:
M27 The Dumbbell Nebula, NGC 40, NGC 246, NGC 1535, NGC 2392 The Eskimo Nebula, NGC 3132, NGC 3242, NGC 6210, NGC 6543, NGC 6572, NGC 6826, NGC 7009 The Saturn Nebula, NGC 7662, M57 The Ring Nebula.

Other nebula don't have any particular type of shape:
North America Nebula, Pelican Nebula, The Great Orion Nebula, M8 The Lagoon Nebula, M20 The Trifid Nebula, Rho Ophiuschi, NGC 6334, and many more, particularly near the Milky Way.

Dark nebulas are dark clouds of gas and dust that are often outlined by bright objects behind them. There is a dark nebulosity about 2 degrees south of M62, Barnard 86 is a dark nebula in The Archer in the Milky Way. There are many others, in Orion and elsewhere, that you can see.

Star clouds are areas of our own galaxy that are especially rich in stars. They are too large to be seen all at once through the scope, but they make impressive areas of the sky to sweep through with the 60mm telescope. M11 The Scutum Star Cloud, in The Shield, is the largest and most impressive but sweeping along the length of the Milky Way at the lowest power possible will turn up many areas where your view will be filled with countless stars.

In future articles I'll give more details and tips on observing these different types of objects with the small telescope. If you've got a larger scope than 60mm, remember, you can see these objects, too, and in more detail.
StumbleUpon
Add to Technorati Favorites